

Run your dual-booted Ubuntu install under Windows with VMWare


First off, this isn't what you might call a "supported" configuration so as ever YMMV and don't blame me if it goes horrifically wrong and you end up with two/three systems that won't boot (your VM, your native install and optionally, the VM host :P). Having said that it worked fine for me, but it might be wise to make a disk image somewhere else and have a livecd ready if it goes wrong and you need to do recovery. Also you can possibly do this with VirtualBox or VMWare Player, but I haven't tried it. I started with Ubuntu 15.04 installed on my second hard disk in an extended partition along with an NTFS data partition, and Windows 10 on the other disk which is the primary (but is an SSD, so it's small) along with VMWare Workstation 12.
In short we're going to create the VM, then add an extra boot disk and install GRUB into this from the Ubuntu DVD.
First off, create a new VM, choose a Custom machine and go through all the usual steps of names and locations and cores and RAM. When you get to "Select a Disk Type", choose SATA (if you choose SCSI it will whinge on first boot that performance will be poor). Then select "Use a physical disk", set Device to the correct disk (PhysicalDrive1 in my case) and choose Use individual partitions, then tick the relevant partitions for your Linux system (ie the root filesystem and the swap partition).
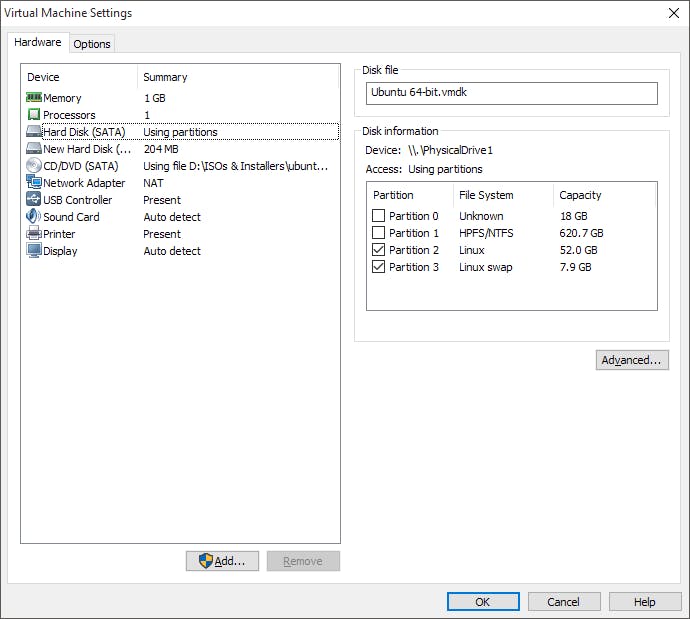
Click Next a few more times and then Finish (don't hit Customize Hardware, or it doesn't bother adding the disk). Then edit the machine to add a hard disk. This one can be SCSI since it'll be an actual virtual disk, you want to create a new one and set the size for something like 200MB (it's going to have the boot partition, so not much space needed!). Finally mount the Ubuntu 15.04 live disk in the CD drive, as you'll need to boot this first.
Now boot the machine. At this point you might be told "Insufficient permission to access file"; when I had this working in Workstation 9 it would just throw up a UAC prompt but apparently 12 doesn't, so restart VMWare Workstation as administrator to get that low-level disk access we need. Once you've got to the live desktop, open a terminal (Ctrl-Alt-T in Ubuntu). We're going to format our new virtual disk, then chroot to it and install GRUB. To partition and format the new disk, run the following, but first heed this warning: for me the virtual disk was /dev/sda, but I suggest checking with ls /dev/sd* to make sure you don't overwrite your dual-boot disk, as that would be a mess!
parted /dev/sda mklabel msdos
parted /dev/sda mkpart primary ext2 0% 100%
mkfs.ext2 /dev/sda1
It goes without saying these have to be run as root. Next up comes courtesy of AskUbuntu user Nathan Kidd, on this question which explains how to chroot to an empty disk; it looks like this:
mkdir /mnt/chrootdir
mount /dev/sda1 /mnt/chrootdir
for dir in proc dev sys etc bin sbin var usr lib lib64 tmp; do
    mkdir /mnt/chrootdir/$dir && mount --bind /$dir /mnt/chrootdir/$dir
done
chroot /mnt/chrootdir
Finally we need to install GRUB and then run an update to generate the menus, and we're done!
grub-install
update-grub
That's it! Exit the chroot, shutdown the VM (it hangs, I had to hard-reset) and remove the ISO, and the next time it gets booted it'll be running the real Ubuntu install on your hard disk. Remember to install the open-vm-tools and open-vm-tools-desktop packages or VMWare Tools to make auto-resize and stuff work. Also I wouldn't suspend the VM and then boot the real copy...that pretty effectively kills both the VM and the underlying install in my experience.